If you live in the U.K. there is just no escaping from the festivities coming up this weekend, marking 60 years of the Queen's reign! Not only that, we've got the Olympics to look forward to in July ... so on that note, I've designed a range of:
![]()
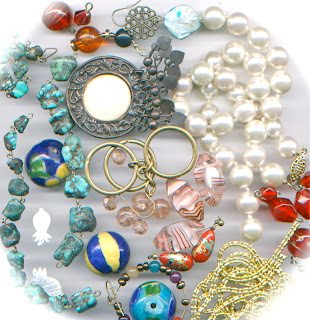
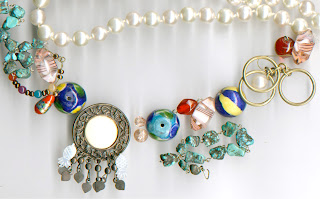
The base ingredient of this souvenir
collection is a Union Jack Button supplied
by BEADS DIRECT, together with a few
other findings that you will find on their
online catalogue. This is my homage to
the Pearly Kings & Queens of London
(albeit a sideways nod to royalty!).
![]()
![]()
![]()
![]() 4. Thread the end of the wire through the back of a second button, followed by a silver crystal bead. Don't leave any spaces between the buttons - make them slightly overlap.
4. Thread the end of the wire through the back of a second button, followed by a silver crystal bead. Don't leave any spaces between the buttons - make them slightly overlap.
![]() 5. Repeat as before, threading a third button from the back with wire, but this time add the bead cap, followed by the crystal bead ...
5. Repeat as before, threading a third button from the back with wire, but this time add the bead cap, followed by the crystal bead ...
![]() 6. Repeat, as before, threading two further beads and buttons to finish the centrepiece of the necklace.
6. Repeat, as before, threading two further beads and buttons to finish the centrepiece of the necklace.
![]() 7. Use your round nosed pliers to create a double wrapped link at the opposite end. (Above: you see the back of the piece.)
7. Use your round nosed pliers to create a double wrapped link at the opposite end. (Above: you see the back of the piece.)
![]()
(A) As an optional extra ... create a small
beaded garland for your centre bead,
by cutting approx. 3" (7.5cm) of 0.4mm
wire and threading with about 15 seed
beads (as many as required to sit snugly
around your 8mm crystal).
Push the beads to the centre of the wire
and cross the wires over to form a beaded
loop.
![]()
![]()
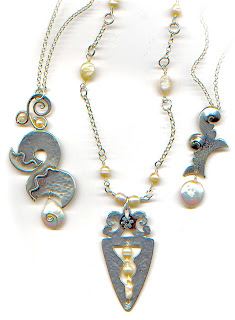
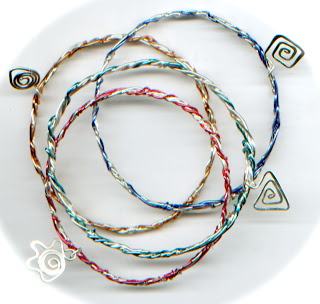
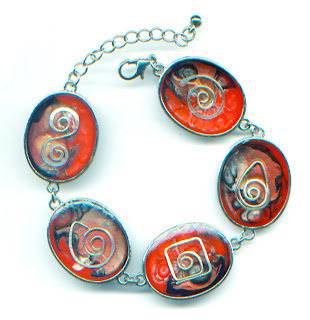
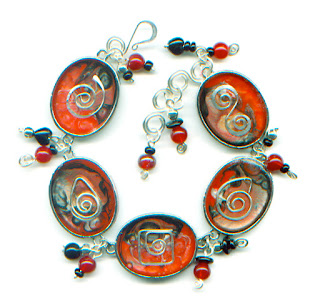
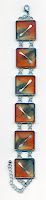
![]() To create the bangle, follow steps 1-7 of the necklace, omitting the flower bead cap (or "Tudor Rose" of England!). Connect beading elastic to each side of the links at the back of the buttons and thread this elastic with a combination of silver crystals and seed beads. This means the bangle will stretch (at the back) to slip over the hand and will fit a variety of different wrist sizes!
To create the bangle, follow steps 1-7 of the necklace, omitting the flower bead cap (or "Tudor Rose" of England!). Connect beading elastic to each side of the links at the back of the buttons and thread this elastic with a combination of silver crystals and seed beads. This means the bangle will stretch (at the back) to slip over the hand and will fit a variety of different wrist sizes!
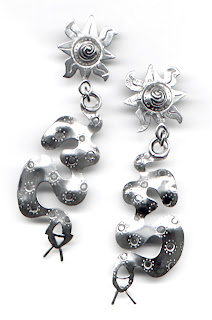
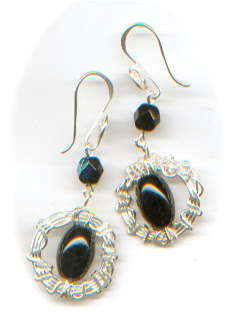
![]() To make these earrings, cut about 2 x 6" (15cm) of 0.4mm wire and thread the centre with silver crystal beads. Push the ends of the wires through the button holes and twist tightly together at the back of the button with your fingers. Thread the twisted stems with some choice beads and push them upright, so that the buttons sits at right angles to the stems. Use your round nosed pliers to make wrapped loops out of the projecting twisted wires, ready to suspend from fish hook ear wires.
To make these earrings, cut about 2 x 6" (15cm) of 0.4mm wire and thread the centre with silver crystal beads. Push the ends of the wires through the button holes and twist tightly together at the back of the button with your fingers. Thread the twisted stems with some choice beads and push them upright, so that the buttons sits at right angles to the stems. Use your round nosed pliers to make wrapped loops out of the projecting twisted wires, ready to suspend from fish hook ear wires.
![]() Another simple, quick project to make is a button ring: just bind this onto an adjustablering holder.
Another simple, quick project to make is a button ring: just bind this onto an adjustablering holder.
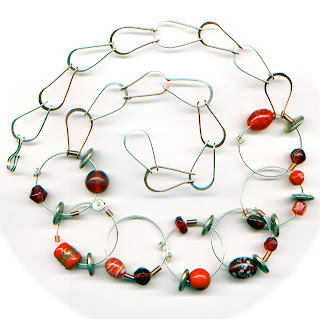
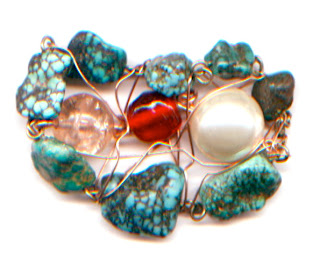
![]() You will need 2 buttons to make these. Place the buttons back to back and thread with the crystal beads on each side to secure together as one. Bind the remaining projecting wire around the beads to frame them on each side and neaten ends. Cut a length of 0.8mm wire and wrap this around the gap surrounding the buttons creating a large loop and bead stem. Cut another length of 0.4mm wire and create a beaded circle to decorate the outer edges. The trigger keyring and chain are perfect for handbags, belt decorations, zipper ornaments, pencil case charms, key holders, etcetrarara ...
You will need 2 buttons to make these. Place the buttons back to back and thread with the crystal beads on each side to secure together as one. Bind the remaining projecting wire around the beads to frame them on each side and neaten ends. Cut a length of 0.8mm wire and wrap this around the gap surrounding the buttons creating a large loop and bead stem. Cut another length of 0.4mm wire and create a beaded circle to decorate the outer edges. The trigger keyring and chain are perfect for handbags, belt decorations, zipper ornaments, pencil case charms, key holders, etcetrarara ...
I hope this provides some inspiration for some quick makes to help celebrate the summer 2012! If you don't live in the U.K. and have no reason to create patriotic pieces - just adapt and use coloured buttons instead!
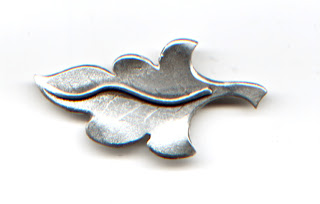
![]() Psssssst ....
Psssssst ....
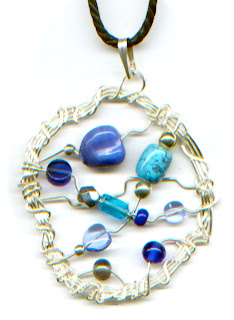
I also designed this
Jubilimpic Pendant,
that can also double up
as Brooch, but not having
a camera and only being
able to scan my pieces -
I couldn't get a good image
of it ... with the jump rings
suspended with red seed beads
around the exterior.
The jump rings do look
quite effective hanging down
on each side creating a sort of
'shaggy dog' look!
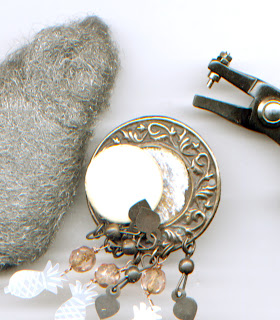
The button and flower bead cap, etc .., have
all been wired to a sieve disc with beaded
jump rings attached around the perimeter!
JUBILIMPIC JEWELLERY
which you can create for yourself, family and friends, to get yourself in the mood and spirit of these most historical occasions!
The base ingredient of this souvenir
collection is a Union Jack Button supplied
by BEADS DIRECT, together with a few
other findings that you will find on their
online catalogue. This is my homage to
the Pearly Kings & Queens of London
(albeit a sideways nod to royalty!).
JUBILIMPICS NECKLACE
Materials required: 5 Union Jack Buttons, 5 x 8mm silver Czech glass crystals, 1 silver coloured flower bead cap, 1 silver chain and some 0.4mm silver plated wire.

1. Cut approximately 8" (20cm) of 0.4mm wire. Place your round nosed pliers about an 1" (2.5cm) from one end and curl the wire twice around to create a double link. Wrap the excess around the base of the link to form a wrapped loop. Cut off any excess with your cutters.

2. Thread the end of wire through the BACK of the button through one of the holes, followed by a 8mm silver fire polished crystal bead.

3. Pull the wire, so that the double wrapped link sits at the back of the button. Thread the wire back through the second hole, positioning the bead in the centre, above the button hole.


(A) As an optional extra ... create a small
beaded garland for your centre bead,
by cutting approx. 3" (7.5cm) of 0.4mm
wire and threading with about 15 seed
beads (as many as required to sit snugly
around your 8mm crystal).
Push the beads to the centre of the wire
and cross the wires over to form a beaded
loop.

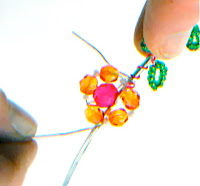
(B) Re-thread the end of one of
the wires back through one of the last
beads to create a beaded circle.
![]()
(C) Place the beaded circle around the central crystal and pull the wires tight around the bead to frame it. Push the wire ends towards the button, through the gaps of the bead cap and wrap around the base of the bead cap, between the cap and button.the wires back through one of the last
beads to create a beaded circle.


Now, all that's left to do is connect a chain to each side and it's ready to wear!
JUBILIMPIC BANGLE

JUBILIMPIC EARRINGS

JUBILIMPIC RING

JUBILIMPIC KEY CHAIN or BAG CHARM SOUVENIR

*******

I also designed this
Jubilimpic Pendant,
that can also double up
as Brooch, but not having
a camera and only being
able to scan my pieces -
I couldn't get a good image
of it ... with the jump rings
suspended with red seed beads
around the exterior.
The jump rings do look
quite effective hanging down
on each side creating a sort of
'shaggy dog' look!
The button and flower bead cap, etc .., have
all been wired to a sieve disc with beaded
jump rings attached around the perimeter!
HAPPY JUBILIMPIC WIREWORKING!!